Wednesday 28 December 2011

Rajma Soup / Red Kidney Bean Soup

With the party season coming to an end, it won't be long before everyone is looking for healthy & low-calorie recipes. I would say this recipe fits the bill perfectly.


I am sure all of you know the nutritional value of Rajma (Red Kidney Beans), so I am not going to get into that. I had bookmarked this particular recipe by Tarla Dalal a while ago but never tried it as I felt it was incomplete.

I know she didn't become one of the best selling cook book authors in India by writing incomplete recipes. That's what drove me to follow her recipe almost word-to-word. The result??? No wonder she is one of India's best selling cook book authors.

Here's my tweaked recipe:


Serves: 2 - 3 as a complete meal

Ingredients
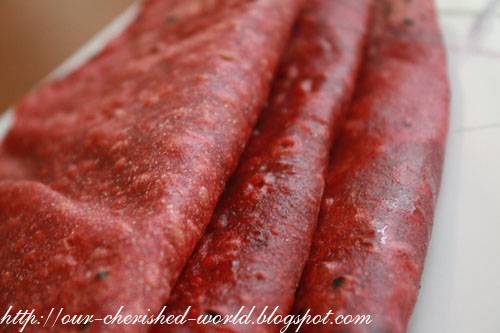
1 cup Rajma / Red Kidney Beans - soaked over night and drained
1 Onion - finely chopped
1 Tomato - finely chopped
4 Cloves Garlic - sliced
1 tsp Red Chilli Powder (adjust or omit - I didn't use)
1 tsp Lemon Juice
2 tbsp Oil
Salt to taste
Chopped Coriander Leaves for garnish

Method
  1. Heat oil in a pressure cooker. When hot, add the Onions and saute till they become soft.
  2. Add the Tomatoes and Garlic and fry for a minute.
  3. Now add the Red Chilli Powder (if using) and salt and mix well.
  4. Add the drained Rajma and 3 cups of water and mix well.
  5. Pressure cook for about 4 - 5 whistles (or till done).
  6. Let it cool completely, transfer to a blender and blend to the desired consistency.
  7. Garnish with Corinader Leaves and serve.

Note: You can also use 1 400gms (14oz) tin of Red Kidney Beans. Make sure you drain and rinse well.

This goes to the following events:

Kiran's MLLA #42 that was started by Susan


Radhika's Winter Carnival
 

Friday 23 December 2011

Vegetable Kothu Paratha / Kothu Roti

This is the famous road side food in Chennai. I’ve never eaten it in Chennai, but when my cousins came to visit me last year, they made this for us and it was very tasty and different (for us).


They made it with Chicken and Egg. I wanted to try making it with Vegetables for a long time now, but never got around to do it. I was going through Amy’s blog and found that Kothu Roti is part of the Sri Lankan cuisine as well.


Serves: 2 – 3 as main course OR 4 – 5 as snack

Ingredients
5 Layered Parthas – cooked and roughly chopped (I used store bought frozen ones)
2 Onions – finely chopped
3 Green Chillies – finely minced (adjust)
2 cups mixed vegetables (I used Carrots, Beans & Peas)
1 tsp Ginger Paste
1 tsp Garlic Paste
2 Tomatoes – finely chopped
½ tsp Red Chilli Powder (optional)
¼ tsp Turmeric Powder
1 tsp Coriander Powder
1 tsp Mustard Seeds
1 tsp Cumin Seeds
20 Curry Leaves (1 sprig)
2 tbsp Oil
Salt to taste (remember that the parathas will have salt in them)

Method
  1. Heat Oil in a pan – I used a frying pan as its easier to mix everything.
  2. Once hot, add the Mustard and Cumin Seeds and let them crackle.
  3. Add the Green Chillies and Curry Leaves and saute for a minute or so.
  4. Add the Onions and fry till they turn transparent..
  5. Now add the Ginger and Garlic Pastes and fry till the raw smell goes.
  6. Add the tomatoes, Turmeric, Coriander and Chilli (if using) Powders and cook till the masala comes together.
  7. Now add the Vegetables, mix and cook till they are done.
  8. Now add the chopped parathas and mix well and cook till the parathas are heated through.
  9. Serve hot with Raita or on its own.
Note 1: I have torn the parathas with hand. The pieces are not uniform, but we don’t mind.
Note 2: You can add boiled vegetables to reduce the cooking time.


After our dinner, there was enough left for my lunch box the next day.

This goes to the following events:

Priya's Cooking with Seeds - Peas


Veena's HLI - Peas that was started by Kalyani.


Valli's Snacks Mela


Priya's Flavours of Sri Lanka that was started by Nayna.


Monday 19 December 2011

Spaghetti Aglio e Olio

Trust me... This dish is not as complicated as it sounds... This is the simplest Spaghetti dish I've come across. You should find all the ingredients (total of 4 – including oil) in your pantry.


So this is the perfect late night / in-a-hurry snack / meal. I would also say this is a good bachelor / student dish. Easy and quick, its very difficult to get it wrong. Its very satisfying as well.

Enough of the blah blah... here's the recipe:


Serves: 2

Ingredients 
200 gms Dried Spaghetti (I used Whole Wheat) – cooked as per package instructions (See Note)
2 tsp Red Chilli Flakes
2 tbsp Chopped Garlic
2 tbsp Olive Oil

Method
  1. Heat Olive Oil in a pan.
  2. When the oil is hot, add the Red Chilli Flakes and fry for 30 seconds stirring continuously.
  3. Add the Chopped Garlic and until the Garlic starts to change the colour.
  4. Add the Spaghetti and toss well until it is coated well with the Chilli Flakes and Garlic.
  5. Serve Hot.

Note: To cook spaghetti, bring a saucepan with salted water to a rolling boil. Add in the spaghetti. It doesn't matter if the spaghetti is not immersed fully at the beginning. It will gradually go down. After the spaghetti is immersed in water, cover and cook till its soft. There should still be a bite to it. Strain and rinse thoroughly with cold water. Toss it in 1 – 2 tsp of oil and try to lay it as flat as possible before adding it to the pan.

This goes to Kalyani's 100 day Global Food Festival

Wednesday 14 December 2011

Couscous Upma

I first tasted Couscous in April 2010 in Paris in a Moroccon food court. I loved the texture. I've been trying to use it but P doesn't like it a lot. I made Couscous upma long back. But P didn't like it. So I never made it again.

Different story today... I gave P and V Macaroni & Cheese and I made this for myself.

Though I did not make it like regular upma, I absolutely loved the texture and the taste.


I had only green peas in my freezer so I didn't use any other vegetables. I made an extra portion to take to work for lunch. And since I wasn't giving this to V, I did make it a little extra spicy.


Ingredients
1/2 cup Couscous
1/2 cup Frozen Green Peas - You can use other vegetables as well
1/2 Onion - finely chopped
1/2 tsp Chilli Flakes
1/2 tsp Mustard Seeds
1/2 tsp Cumin Seeds
10 Curry Leaves
1 tbsp Oil
1 cup Water
Salt to taste
Chopped Coriander Leaves to garnish

Method
  1. Heat Oil in a pan.
  2. When hot, add the Chilli Flakes, Mustard Seeds and Cumin Seeds.
  3. When they crackle, add the Onion and Curry Leaves and fry till the Onions turn transparent.
  4. Add salt and mix well.
  5. Add the Peas (and other vegetables) and cook till they are almost done.
  6. Now add the Couscous, mix and add the water.
  7. Get the water to a boil and simmer till the water is absorbed.
  8. Add the chopped Coriander Leaves and mix and serve hot.

This goes to the following events:

Priya's Cooking with Seeds - Peas


Veena's HLI - Peas that was started by Kalyani.

Monday 12 December 2011

Vegetable Cutlets / Patties

The other day, I wanted to make something spicy for P and me and was wondering what to give my 3 year old. I realised there's a huge potato lying in my cupboard and I decided to make cutlets for him.


It was another way to give him vegetables. A simple, easy and healthy recipe that can be adapted to suit individual needs and tastes very easily.

I made a simple spicy spaghetti dish for us (recipe to follow) and made these cutlets for V. He ate this without much fuss.


Ingredients
500 gms Potatoes - boiled and mashed
1 cup boiled and mashed vegetables (I used Carrots, Cauliflower and Green Peas)
1/2 tsp Chilli Powder
1 tsp Coriander Powder
1 tsp Cumin Powder
1 tsp Paprika Powder
1/2 tsp Amchur (Dry Mango) Powder / Lemon Juice
Salt to taste
2 tbsp Oil for pan frying

Method
  1. Mix all the ingredients except Oil and make patties of desired shape & thickness.
  2. Heat Oil in a pan on medium high and put the patties one by one.
  3. Let the patties cook for about 3 - 4 minutes each before turning and cooking them again for 3 - 4 minutes.
  4. Serve with tomato ketchup

Note: I haven't used any "binding agent". So I let the patties cook well before turning them so they don't "break".

This goes to the following events:

Pavani's Kid's Delight Event Announcement – Deceptively Delicious that was started by Valli


Valli's Snacks Mela


Priya's Cooking with Seeds - Peas


Vardhini's Sinful Delights

Saturday 3 December 2011

Ala Badun - Sri Lankan Spicy Potatoes & Onions

After a mild November, December has come with the harsh winter. Its freezing... The only thing I like about December are the lights and excitement of Christmas.

We've put up our Christmas tree today. V was very excited. He's going to Santa's grotto at his nursery tomorrow. Don't know how he'll react then. I am so excited for him. Hee hee...

Anyways. When I saw that Priya is hosting Flavours of Sri Lanka, I started googling for Sri Lankan vegetarian recipes. The one recipe that appeared on every website I visited was Alu Badun - spicy potatoes and onions. And its been ages since I prepared my Alu Fry. So I decided to give this a try.

 It was completely different from whatever I've had till date... In a very nice way.


Ingredients
2 big Potato - boiled, peeled and cut into bite size pieces
1 big Onion - finely chopped
1 tsp Chilli Powder
1 tsp Paprika
1/4 tsp Turmeric Powder
2 sprigs of curry leaves
1 tsp Ground Mustard (See Note)
1 inch Cinnamon stick
2 tsp Lemon Juice
3 tbsp Oil
Salt to taste

Method
  1. In a bowl, take the Potatoes and mix with Salt, Turmeric, Chilli Powder and Paprika Powder.
  2. In a pan, heat the oil.
  3. Add the curry leaves and fry for a few seconds.
  4. Now add the Onions, Ground Mustard Seeds and Cinnamon and fry till the Onions turn golden brown.
  5. Add the Potatoes to the pan, mix well and cook till the Potatoes are heated through.
  6. Add the Lemon juice, mix well and turn off the heat.
  7. Remove the Cinnamon Stick and serve hot with rice / roti.

Note: Soak 1 tsp Mustard Seeds in warm water for about an hour. Crush the seeds using Mortar & Pestle / Mixie to the desired consistency.


This goes to Priya's Flavours of Sri Lanka that was started by Nayna.


Wednesday 30 November 2011

Beetroot Chapati

Another way of feeding my 3 year old Veg. He doesn't eat any veg as a side dish. I personally believe there's not much nutrition in a plain chapati. So I cook and puree a vegetable and give him. That way he gets his nutrition and gets to eat chapati. Moreover, he looooooves his "pink" chapati. :).

I keep this chapati very simple. Absolutely no spices are added. I feel the spices do not balance the sweetness of beetroot.That's my personal opinion.

Since there are not particular ingredients, I will explain briefly how I made this.


Take 1 beetroot. Peel and chop and cook. I cook it in the microwave. If cooking in the microwave, its like cooking a potato. Once cooked, drain any water, let cool and grind it to a smooth paste. Do not throw the water. You can use when mixing a dough. You can also freeze it and use it the next time you are making chapati.

Take 2 cups atta, mix the paste and add extra water as needed and knead a dough. Let it rest covered for 30 minutes. Now make your chapatis as usual.


Me and P have it with a curry on the side. But our 3 year old just eats plain "pink" chapati.

Wednesday 16 November 2011

Soya Nugget Pulao

Is the climate really changing??? Its been unusually warm for November here in Scotland. We are having frost spells once a week. I remember it used to be more often than that. Not that I am complaining :-) . I just hope this is not the lull before a storm. I definitely don't want a snow storm like last year when P and I were stuck in the traffic for 12 hours each.

Coming to today's recipe, I am not going to start off on the health benefits of soya. I am sure you guys know and have heard from loads of other blogs. I am not going to repeat it. Incase you are unaware of the benefits of soya, just google it. You will be inundated with information.

After knowing the benefits of soya, I have been wanting to incorporate it in our meals forever but never got around to do it. About a month back, I came across packets of soya nuggets and soya kheema in the Asian grocery store. Without thinking twice, I picked them up. They've been sitting in my cupboard from then on.

Last Sunday, I decided I need to start using the soya. So I made this soya nugget pulao and all of us liked it. Here's the recipe:


Ingredients
1.5 cups Basmati Rice – washed and soaked in water for atleast 20 mins
1.5 cups Soya Chunks – prepared (See Note 1)
1 small Onion – chopped
1 tsp Ginger Paste
1 tsp Garlic Paste
1 Tomato – chopped
1 tsp Shahjeera / Caraway seeds
1 Bay Leaf
5 Cloves
4 Green Cardamoms
1 inch Cinnamon stick
2 tbsp Oil
Salt to taste
Chopped Coriander Leaves to Garnish

Make a paste:
Stems of 1 bunch of coriander
10 – 12 mint leaves
2 Chillies

Method
  1. In a pan, heat the oil. When the oil is hot, add the Shahjeera, Bay Leaf, Cloves, Green Cardamoms and Cinnamon Stick and fry for a minute.
  2. Add the chopped Onion and fry till translucent.
  3. Add the Ginger and Garlic pastes and fry till the raw smell goes.
  4. Now add the tomatoes and cook till the masala comes together.
  5. Now add the paste and fry till the raw smell goes. It is very important to fry this paste well if you want the pulao to taste good.
  6. Now add the drained rice and fry for 5 minutes.
  7. Add 1.5 cups water, salt and mix .
  8. Get to a boil on medium high without covering the pan.
  9. Once it boils, reduce to sim and cover and cook till done.
  10. Garnish with chopped Coriander Leaves and serve hot with raita.

Note 1: Boil some salted water in a pan. Add the soya chunks and cover and cook for 10 mins. Take the pan off the heat and let it sit for atleast 30 minutes. You should see that the soya nuggets have swollen up. Drain and squeeze out the extra water from the nuggets and cut / tear them to desired size. The nuggets are now ready to use.


This goes to Vardhini's Dish it out - Soy and Tomatoes.

Friday 11 November 2011

Pesarattu / Mung Bean pancakes

Finally back with a new recipe. Hope I can continue putting up more recipes as I did last year.

As far as I know, this is a very "Telugu" dish. This is a quicker & healthier option to Dosa. Quicker because there's no fermentation required. Healthier because it uses more green gram than rice. You can make it more healthy(and tastier) by "filling" it with different kinds of vegetables.


Upma is the favourite accompaniment to this. The "Pesarattu – Upma" combination is often called MLA Pesarattu. I am not sure how or why this name originated but that's how the combo is called.

According to me, Pesarattu is best eaten with Ginger Chutney. I don't know how to make this and I get this from India.

Though rice is not required for this recipe, I use a little bit of rice to give it the crispy texture.


Ingredients:
2 cups Mung Beans
2 tbsp raw rice OR 1/2 cup cooked rice
2 tsp Ginger Paste
1 Onion - roughly chopped
3 Green Chillies (adjust)
2 tsp Cumin Seeds
Salt to taste

For the filling: (optional)
1 Big Carrot – finely grated
1 Onion – finely chopped
2 – 3 Green Chillies (adjust) – finely chopped
1 – 2 tsp Grated Ginger

Method
  1. Soak Mung Beans and rice separately for atleast 12 hours.
  2. In a blender, add all the ingredients (not the ones under filling) except Mung Beans and blend to a smooth paste using as little water as possible.
  3. Now add Mung Beans and blend to a coarse batter using as little water as possible.
  4. This batter is a little thicker than the regular dosa batter.
  5. Heat a dosa pan (crepe pan) to medium high.
  6. Pour a ladle full of the batter and spread it as thin as possible
  7. Add the spread the filling as required.
  8. Pour a tsp drop by drop around the ends of the pesarattu and cook well.
  9. If required, flip it and cook for some more time.
  10. Flip it back and fold it in half and remove it onto a plate.
  11. Serve hot with a chutney of your choice.

Note: This is a bit heavier than the regular dosa. You might not be able to eat as many as regular dosas.

This goes to Priya's Cooking With Seeds-Mung/Moong Beans

Tuesday 9 August 2011

Ragi Dosa

Ragi Dosa

I like Ragi (Finger Millet) for its nutrional value. In my first attempt to give V Ragi, I made Ragi Dosa. He loves Dosa so I assumed he will like this as well.

I was wrong. He didn't like the taste. But P kept him busy and fed him.


I first had this dosa when my cousin made for me last September. I really liked it. She got it very thin and "lacy". I didn't get it anything like that. It was more like dosa. I guess I need to practice more to get it right. It was tasty though. I will be making this more often and keep giving it to V. He'll develop a taste for it.

This is quiet simple. It doesn't need fermentation time. Just some "resting" time of about half an hour.


Ingredients
2 cups Ragi Flour
1 cup Rice Flour
1 cup Curd – Beaten well
1/2 Onion – Finely Chopped
2 Chillies – Finely Chopped
1 Carrot – Grated (optional – but healthy)
2 cups Water
Salt to taste
Oil for making dosas

Method
  1. Sift the flours and Salt into a bowl. Add curd to this and mix well.
  2. Add water and keep stirring so that no lumps are formed.
  3. Add the Onion, Chillies and Carrot and mix well.
  4. Add more water if needed. It should be watery in consistency.
  5. Keep aside for atleast half an hour.
  6. Heat a dosa pan and pour the batter to form a dosa. You will not be able to spread it.
  7. Turn the heat to medium and cover and cook for atleast 2 minutes.
  8. Add Oil to the edges so the dosa wont stick to the pan.
  9. Flip the dosa and again cover and cook for atleast 2 minutes.
  10. Serve with Chutney or by itself.

Note 1:I made dosa for V before adding the Onion and Chillies.
Note 2:My dosas came out a bit thick. So I had to cook it for around 3 minutes on each side. Any tips are welcome if you know where I went wrong. :)

This goes to Denny's Cooking with Whole Foods - Ragi / Finger Millet that was started by Kiran.


Wednesday 3 August 2011

Beans Curry

Ever since my parents have gone, my freezer has been bursting with food that my mother made and froze before she left and other stuff. So I am trying to empty the freezer – eating her food and using up other veggies.

This is another of my "invention". I had made beetroot rotis (recipe will come soon) the other day and was toggling and googling for a "new" side dish. There were beans in my freezer for quiet some time. So I decided use them up.

I called up my mother (her sister – my usual source of recipes – sleeps early. So I didn't want to disturb her). She gave me the usual recipe for beans. Then I asked my sis-in-law – she was even more vague than my mother. After chatting for sometime, my sis-in-law said – "You try out a dish and let me know how to make it if it come out fine."

I thought this wasn't working out. It was time to put my thinking cap on. That's how this extremely simple dish was born. P liked it a lot. So it was worth the experiment. I took some left over curry for lunch the next day with rice. It tasted good with rice also.


Ingredients
300gms Green Beans – cut into 1 inch pieces (I used frozen cut beans)
1 Onion – chopped
1 Tomato – chopped
1 Dry Red Chilli - torn into pieces
1 tsp Mustard Seeds
1 tsp Cumin Seeds
1/4 tsp Turmeric Powder
1 to 2 tsp Sambar Powder
20 Curry Leaves
2 tbsp Oil
Salt to taste

Method
  1. Heat oil in a pan. When hot, add the torn red chilli and fry for a minute.
  2. Then add the Mustard and Cumin Seeds and let them crackle.
  3. Now add the Onions and Curry Leaves and fry till the Onions turn golden brown.
  4. Add the Salt, Turmeric Powder and Tomatoes and cook till the tomatoes are mushy.
  5. Now add the beans, mix well, cover and cook till the beans are done. Add a little water if necessary.
  6. Once the beans are done, add the Sambar Powder, mix well and turn off the heat.
  7. Serve hot with rotis / rice.

Tuesday 26 July 2011

Matar Paneer

Another recipe from Sailu's Food. This is probably the most cooked dish in our house from her blog. P is in love with the dish. I made it for one of our friends and she loved it as well. This is another proof that you just can't go wrong with her recipes if you follow them right.

We eat it with rotis and rice.


The very first time I made this dish, I didn't have a few ingredients (Kitchen King Masala, Kasuri Methi and Cream) but it still tasted good. But with all the ingredients, it tasted just perfect.

Since we make this regularly, we avoid the cream. We use cream only when we are expecting some guests.

Without any more blabbering, here’s my version of the recipe:


Ingredients
250 gms Paneer – Cubed
1 cup Frozen Green Peas
1 Large Onion – finely chopped
2-3 Green Chillies – finely chopped
3/4 tsp Ginger Paste
3/4 tsp Garlic Paste
1 Tomato – Finely Chopped
1 tsp Red Chilli Powder
1/4 tsp Turmeric Powder
1 tsp Coriander Powder
1 tsp Kasuri Methi (Dry Fenugreek Leaves)
1/4 tsp Garam Masala Powder
1 tsp Kitchen King Masala Powder
1 tsp Cream
2 tbsp Oil
Salt to Taste
Chopped Coriander Leaves for Garnish.

Method
  1. Heat Oil in a pan. Saute the Onions and Chillies till the Onions turn translucent.
  2. Now add the Ginger and Garlic pastes and fry till the raw smell goes.
  3. Add the Turmeric Powder, Coriander Powder, Red Chilli Powder and mix well.
  4. Add the tomatoes and cook for 5 minutes - until the tomatoes are cooked well.
  5. Take a hand blender and grind to a coarse paste.
  6. Add a cup of water and bring to a boil.
  7. Now add the Peas and Paneer and cook till the Peas are done
  8. Now add the Kitchen King Masala, Kasuri Methi (crush this between the palms of your hands) and Garam Masala and mix well.
  9. Turn off the heat and add Cream and mix.
  10. Garnish with Chopped Coriander Leaves and serve with Rice / Roti.

This goes to the following events:

Radhika's Let's Cook - Subzis


Jayashree's Healthy Lunchbox Ideas - Paneer that was started by Kalyani


Priya's Bookmarked Recipes - Every Tuesday - 26th July 2011(Volume 51)